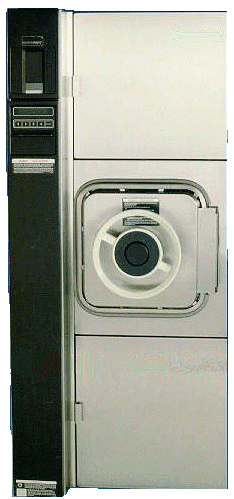
Autoclaving Procedures
 Autoclaves use pressurized steam to destroy microorganisms, and are the most dependable systems available for the decontamination of laboratory waste and the sterilization of laboratory glassware, media, and reagents. For efficient heat transfer, steam must flush the air out of the autoclave chamber. Before using the autoclave, check the drain screen at the bottom of the chamber and clean if blocked. If the sieve is blocked with debris, a layer of air may form at the bottom of the autoclave, preventing efficient operation.
Container Selection
- Polypropylene bags. Commonly called biohazard or autoclave bags, these bags are tear resistant, but can be punctured or burst in the autoclave. Therefore, place bags in a rigid container during autoclaving. Bags are available in a variety of sizes, and some are printed with an indicator that changes color when processed.
Polypropylene bags are impermeable to steam, and for this reason should not be twisted and taped shut, but gathered loosely at the top and secured with a large rubber band or autoclave tape. This will create an opening through which steam can penetrate.
- Polypropylene containers and pans. Polypropylene is a plastic capable of withstanding autoclaving, but resistant to heat transfer. Therefore, materials contained in a polypropylene pan will take longer to autoclave than the same materials in a stainless steel pan. To decrease the time required to sterilize material in these containers,
- remove the lid (if applicable).
- turn the container on its side when possible.
- select the container with the lowest sides and widest diameter possible for the autoclave.
- Stainless steel containers and pans. Stainless steel is a good conductor of heat and is less likely to increase sterilizing time, though is more expensive than polypropylene.
Preparation and Loading of Materials
- Fill liquid containers only half full.
- Loosen caps or use vented closures.
- Always put bags of biological waste into pans to catch spills.
- Position biohazard bags on their sides, with the bag neck taped loosely.
- Leave space between items to allow steam circulation.
- Household dishpans melt in the autoclave. Use autoclavable polypropylene or stainless steel pans.
Cycle Selection
- Use liquid cycle (slow exhaust) when autoclaving liquids, to prevent contents from boiling over.
- Select fast exhaust cycle for glassware.
- Use fast exhaust and dry cycle for wrapped items.
Time Selection
- Take into account the size of the articles to be autoclaved. A 2-liter flask containing 1 liter of liquid takes longer to sterilize than four 500 mL flasks each containing 250 mL of liquid.
- Material with a high insulating capacity (animal bedding, high sided polypropylene containers) increases the time needed for the load to reach sterilizing temperatures.
- Autoclave bags containing biological waste should be autoclaved for 50 minutes to assure decontamination.
Removing the Load
- Check that the chamber pressure is zero.
- Wear lab coat, eye protection, heat insulating gloves, and closed-toe shoes.
- Stand behind door when opening it.
- Slowly open door only a crack. Beware of rush of steam.
- After the slow exhaust cycle, open autoclave door and allow liquids to cool for 20 minutes before removing.
